

This guide explains how to separate administrative accounts in Windows 11. Separating admin accounts from standard user accounts is considered best practice. It immediately reduces security risks and ensures compliance with Cyber Essentials.
Why should you separate your admin and standard accounts?
Administrative accounts in Windows have elevated privileges that allow users to install software, change system settings, and manage other user accounts. While these capabilities are essential for system administration, they also pose significant security risks if misused or compromised.
The principle of least privilege dictates that users should only have the minimum level of access required to perform their tasks. Using an account with administrative privileges for everyday tasks increases the risk of malware infections and accidental system changes. If an attacker was to gain access to your administrative account, they can take full control of the system, installing malware, disabling security controls, and locking you out of your own devices. By creating a separate local admin account and converting your main account to a standard user, you minimise these risks and improve overall security.
Microsoft – Windows 11
All screenshots are taken from a Windows 11 device.
- Open Settings by clicking the Windows Start icon and typing “Settings” and selecting Settings (Cog Icon).
- On the taskbar on the left-hand side, select Accounts.
- Scroll down until you see “Other Users” and click it.
- Once opened, click Add account.

- Then click “I don’t have this person’s sign-in information”.
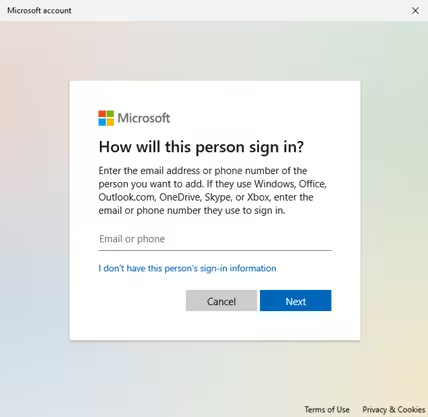
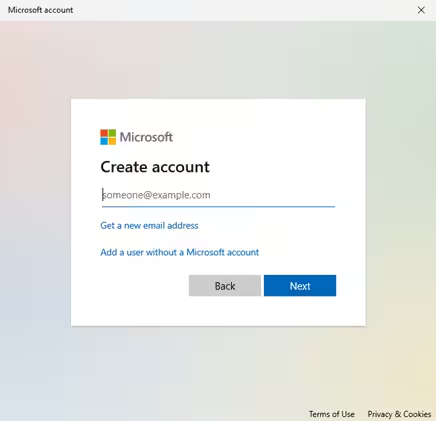
- After that click, “Add a user without a Microsoft account”.
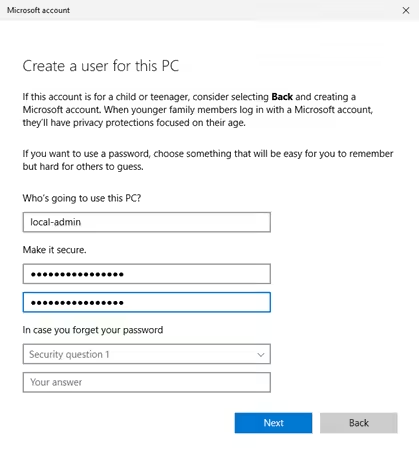
- From there enter the username and password you would like to use for this account. For example, “local-admin”. Fill in the security questions accordingly. Once all the information has been filled in, click Next.
- After clicking Next, you should now be able to see the account you have created.
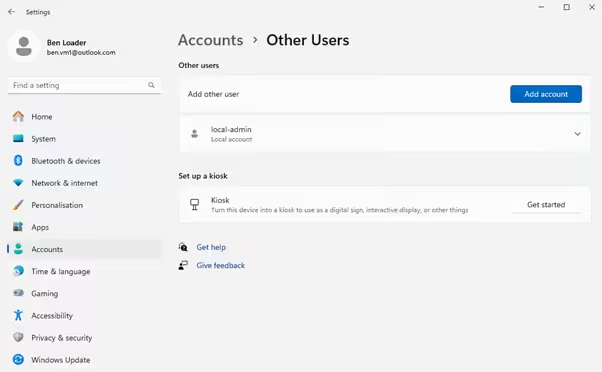
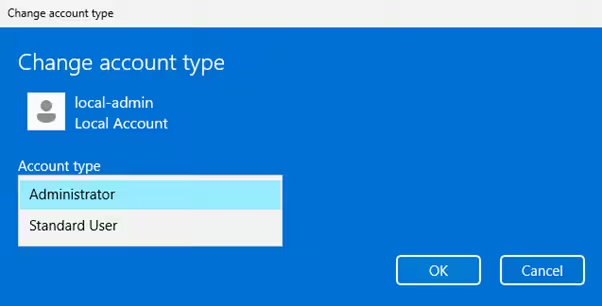
- To change the account type, click on the account you have just created, this will open a drop down, and select Change account type. This will open a popup with a drop down. Select “Administrator” from the list and click OK.
- Now you can see the account has been labelled as “Administrator”.
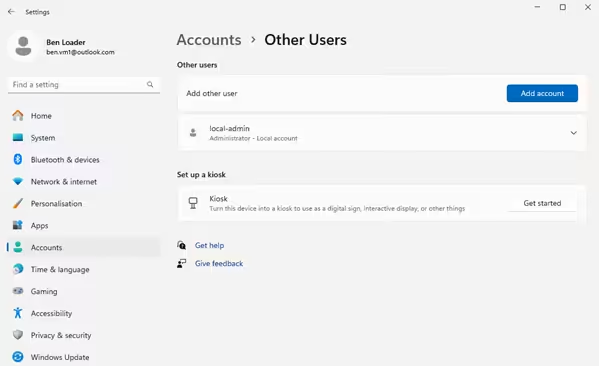
Once you’ve completed these steps, the last thing left to do is to change your account type to a Standard User account. This is very similar to what we did above.
- Switch to the admin account you have just created by going to the Windows icon, click your profile, select the 3 dots in the top right of the pop up, and select the admin account you have just created.
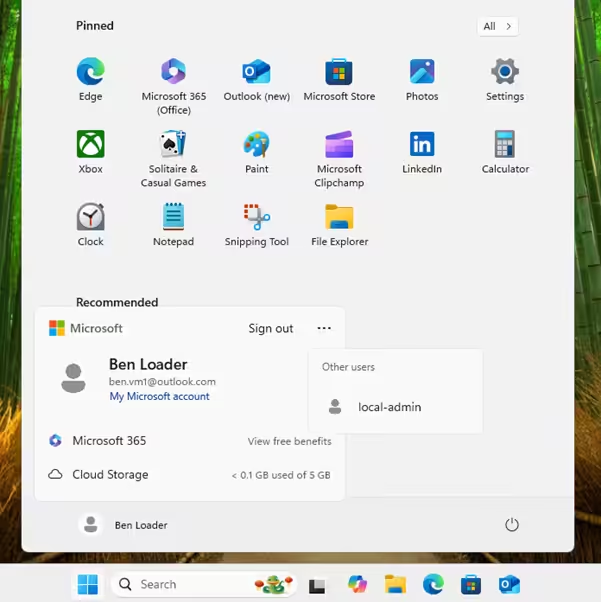
- This will then prompt you to log in with the credentials you have just set up for this admin account. There may be an initial set up, select the options accordingly.
- Once signed in, open Settings by clicking the Windows Start icon and typing “Settings” and selecting Settings (Cog Icon).
- On the taskbar on the left-hand side, select Accounts.
- Scroll down until you see “Other Users” and click it.
- You will now see your main account in the Other users
- Simply click the user, Change account type, and select “Standard” from the drop down and select OK.
Now you have set up your main account as a standard user with a separate local admin.
If you’re unsure about any of these steps, please contact us on 01748 905 002 or email: info@evolvenorth.com, we’re happy to help.